Showing posts with label tools. Show all posts

Friday, March 8

Review: Tangle Teezer

Received an announcement from Luxola that they carry the Tangle Teezer and I got inspired to write this.

Let me tell you the story of my Tangle Teezer, which I've had for a couple of years now.

I have really long hair (or had, since I've cut it to chest-length now), and even though people compliment me on how fine and naturally straight my hair is, I've always had problems with tangles, especially after a hair wash. It's almost impossible to work a normal wide-tooth comb through the tangles. Hence, I used to blow dry my hair freestyle, without using a comb but after my hair is dried, it's still tough to work a comb through the hair since it's now a dry, tangled mess and I suffered from a lot of breakages.

Enters Tangle Teezer, which I happened to chance upon in my early days of exploring ASOS. It was priced at GBP$10 and although it was so ridiculously expensive for a comb and odd in shape, I purchased it out of pure curiosity.

The description on the Tangle Teezer website reads:

Tangle Teezer Original professional detangling hairbrush is loved by hairdressers and used in professional hair salons. It's a super smooth operator that works the minute hair is lathered and rinsed. Glides through wet, vulnerable and colour treated hair with no pulling, tugging or yanking. Hair peace at last!

When it arrived, I was all like, "What is this bright pink, plasticky odd-shape bulky thingmajig?" I put it to the test and hallelujah! I was a die-hard Tangle Teezer convert for life.


The teeth are kind of sharp/pointed but pliable. The entire body is made up of plastic and even though the comb looks clunky, it's really quite light. There's a slight curve which enables you to hold it comfortably, but my hand is kind of small as the rest of me is, so I really have to stretch my fingers to grip it securely, and I do drop this ever so often. Heads up: dropping this will result in a thunderous clattering due to its material and size.

This comb works through any tangles. Unless your hair has mysteriously tied itself into dead knots. Otherwise, there are no knots this Houdini can't get out of. I was stumped the very first time I used it - how can combing my hair be so smooth and easy, and has no resistance from tangles? It magically glides down the length of my hair - any simple tangles untangle easily along the way. If it meets slightly more knotted tangles, you can feel a very slight tug but it doesn't hurt, and those pesky tangles will soon be gone too.

What I love most about this though, is how hair that has fallen out is so easily removed from the teeth of the comb. In the first place, there shouldn't be as many hair on your Tangle Teezer as on your usual comb since the breakage of hair is reduced drastically but whatever hair remains on the Tangle Teezer, just face the teeth downwards and give it a few hard shakes. Most of the hair will gradually float to the ground. Whatever strands remain, just use your fingers to pick them off - the teeth are flexible anyway. It's completely unlike those round brushes with rubber bristles where your hair is most likely wound tight around the teeth and it takes ages to de-hair those brushes!

Another thing to love about the Tangle Teezer? It is mad awesome when you comb your hair because those teeth are like little angels' feet pattering on your scalp. It is a gorgeous scalp massage at the same time. My husband who has really short hair that requires no form of grooming (except some wax) often asks for my Tangle Teezer to 'comb' his hair. He really only likes the feeling of the teeth massaging his scalp.

And one more thing to love (there're like a million things to love about it) about the Tangle Teezer is that it comes in awesome shades. When I first purchased it, it was only available in Bubblegum Pink. Now, it also comes in Cosmic Black and Tangerine Scream on ASOS, and Disco Purple on Luxola. Plus! They've got a new range of products like the Compact Style which comes in completely different designs and a removable cover to protect the teeth, and a range of Aqua Splash Tangle Teezers for in-the-shower usage to draw products through your hair. One of the compact Tangle Teezers even features Shaun the Sheep! Adorable!

Price-wise, ASOS is selling it at GBP$10, which makes to about S$22 while Luxola is selling it at S$26.90. However, Luxola always has credit card discounts so you may actually get it cheaper than ASOS! Also, I'm sure delivery will be much quicker if you purchase it from Luxola.

Link to purchase from ASOS here and link to purchase from Luxola here.

So, I can't believe I wrote a really long entry about a comb. But this is Holy Grail item to me and if I am asked to wax lyrical about it, I will.

P.S. Just purchased Sigma's Synthetic Kabuki Kit 5 Brush Set from Luxola today since they have a 20% discount for Women's Day and I am so excited! If you haven't purchased yours, take advantage of the discount because it ends midnight!

Thursday, February 28

Review: BeautyBlender

How do you apply liquid foundation? Fingers? Brushes? Sponge wedges?

Here's a revolutionary new way - the BeautyBlender!


It's so cute!
The BeautyBlender is an adorable pink teardrop-shaped sponge that is amazingly soft and bouncy.

Taken straight from the BeautyBlender website, here's the description for this little miracle worker:

Now you can look like a movie star without the pricey services of a major make up artist. Introducing Beautyblender, the ultimate make up sponge applicator. Invented by top Hollywood make up artist Rea Ann Silva, Beautyblender has been created to leave you with a professional finish and a flawless complexion. Silva knows that the key to a perfect face is simple: a perfect blend. So forget your fingers or sharp-edged triangular sponges, these application methods waste make up and can leave visible streaks.


Beautyblender’s patent-pending elliptical shape makes application foolproof by allowing you to access hard-to-reach areas with stunning ease. Its suede texture is sensual to the touch and its unique curves fit the contours of your face, leaving your make up dazzling and undetectable. Beautyblender is latex free, non-allergenic and odor free.


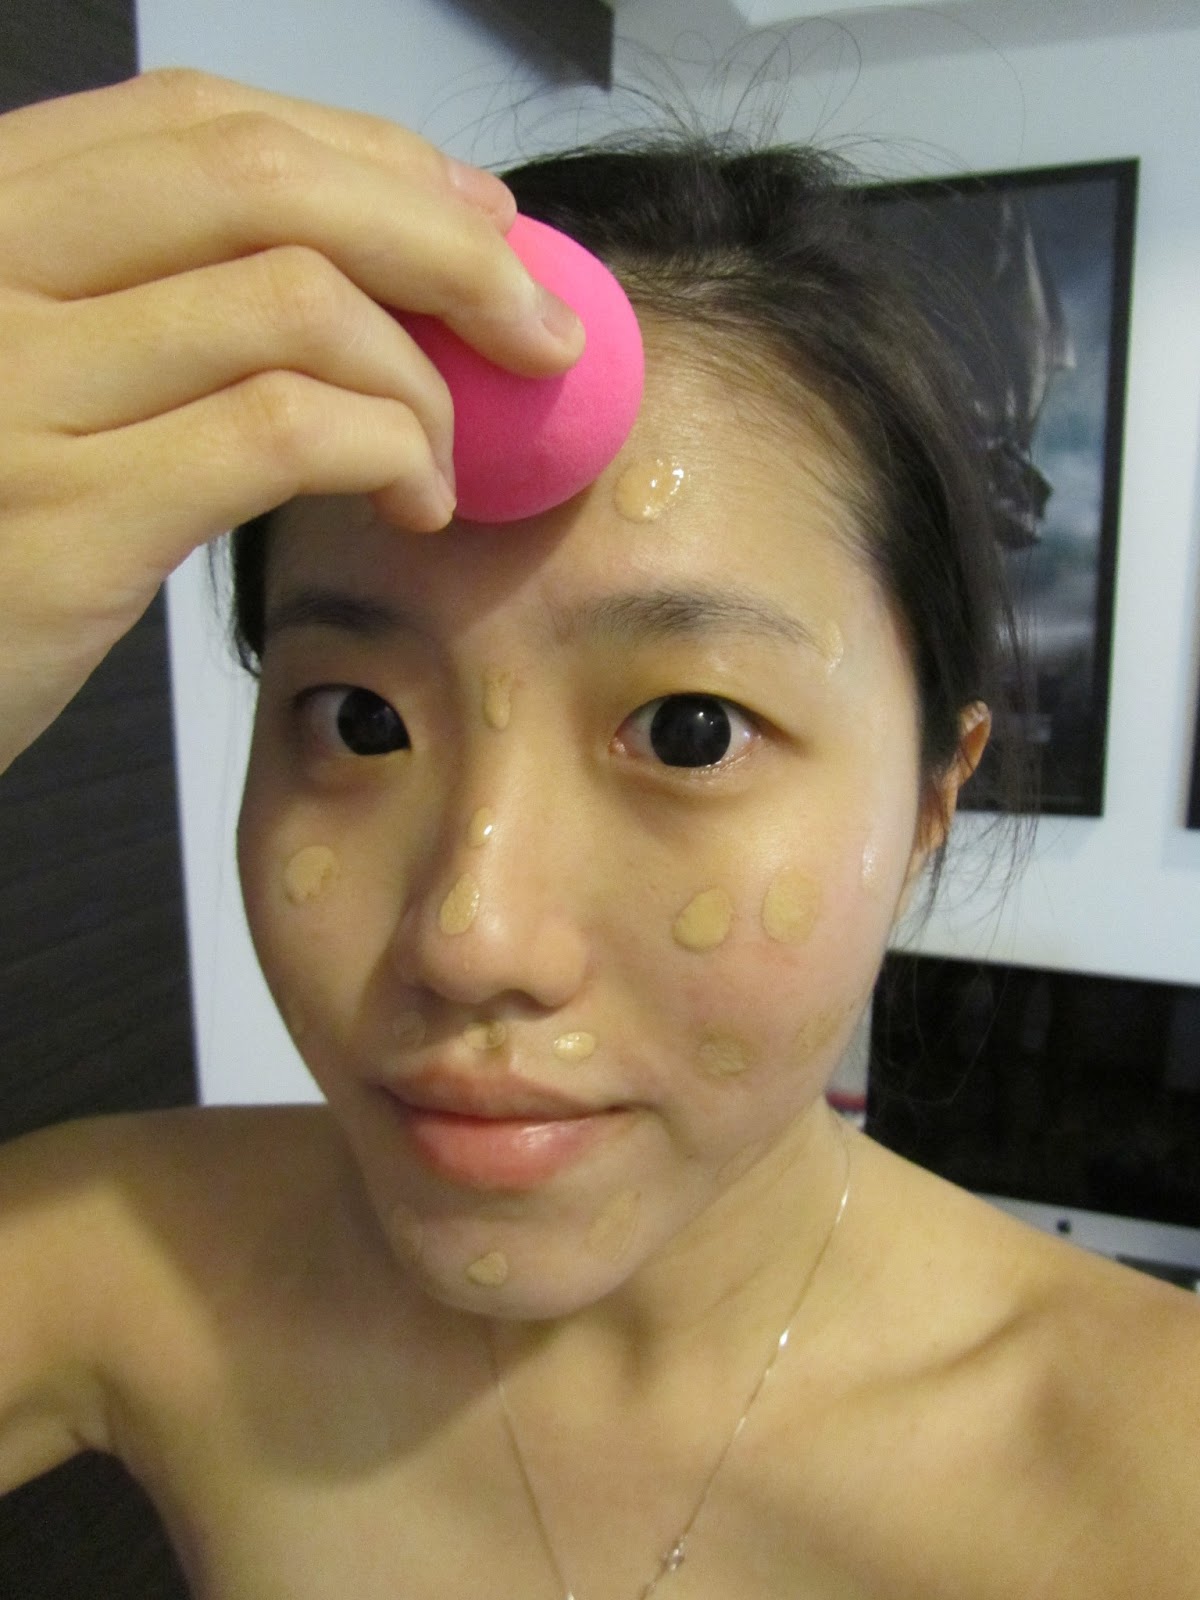
This is me using the BeautyBlender with my favourite Revlon Colorstay liquid foundation.


Steps to Using the BeautyBlender:
  1. Dot liquid foundation all over face. 
  2. Dampen the BeautyBlender by soaking it in water and squeezing out the excess water gently. I prefer to spray some Avene Thermal Spring Water on the sponge instead as I don't like the idea of tap water blending with the liquid foundation onto my skin.
  3. Using the round end of the BeautyBlender, bounce it all over face - this method stipples the liquid foundation onto face and helps to spread and blend flawlessly into skin.
  4. If necessary, use the pointy tip of the BeautyBlender for hard-to-reach areas like around the nose or eyes.
  5. Tadah! Flawless skin!
Liquid foundation applied.
As you can tell, the redness on my cheeks has been covered up nicely. My uneven skin tone has also been smoothed out with just one quick stippling with the BeautyBlender.

I'm going to go ahead and say this is by far the BEST way to apply liquid foundation. I've used the other ways of application before but had issues with each method.

Fingers - I hate getting the products all over my fingers and even though fingers (or skin) supposedly warm up products for better application, the liquid foundation never seems to blend well into my skin and instead, makes me feel like the foundation is just sitting atop my face.

Brushes - I have attempted to use Bubbi Dual Cover Brush and Bubbi HD Flawless Brush (it's no longer selling on the site so here's a link to Bubz demonstrating all her brushes). But as good as the quality of these brushes are, they just don't seem to work well for me. The Dual Cover Brush leaves streaks on my face while the HD Flawless Brush doesn't stipple comfortably because it's just so stiff. The surface area is tiny too so stippling takes ages to complete.

Sponge wedges - This was my method of liquid foundation application before BeautyBlender came along. However, the sponge wedges tend to soak up the product so I used a lot more foundation. Also, with the small triangular sponge wedges, I spread instead of stipple so the blending isn't as smooth. Lastly, the quality of these cheap off-the-shelf sponges is pretty poor and bits start coming off the wedges after a couple of applications.

The BeautyBlender, on the other hand, is amazing. The round surface area is large enough for quick stippling. It takes me half the time it usually does to apply liquid foundation. The sponge is also just so darn soft and it feels luxurious on your skin. PLUS! It's really fun to bounce the sponge all over your face.

After full makeup application.
Of course, there are always angry leprechauns at the end of every rainbow so here are a couple of cons of the BeautyBlender:

It is so darn expensive. It costs about S$29 for one BeautyBlender, and it's only supposed to last for 4-6 months. That's an ROI of S$4.85 - S$7.25 per month and you may not even be using it that much  if you don't use liquid foundation often.

Also, it is a pain to wash. I made a mistake the very first time I used it by not washing immediately after and only doing so when I got back at night. The liquid foundation had already been fully absorbed by the sponge and no matter how much I washed it, the stains remained. :(

But because of the amazing quality of the sponge and the finish of the liquid foundation on my skin, I would repurchase this when the time comes. I don't wish to go back to the alternative ways of liquid foundation application ever again.

So here's to HG (Holy Grail for those of you not in the know) status for the BeautyBlender! *throws confetti*

You can purchase the BeautyBlender here or here. If you wish to purchase the BeautyBlender Blender Cleanser, that's another S$29 or you could just use facial wash like I do.

Some random photos to follow...


The above is my eye makeup after 9 hours, at the end of the day. I used:

Eyeshadow Primer: TFSI Anti-Crease Eye Shadow Primer
Base Highlight: L'Oreal Infallible Eyeshadow in Hourglass Beige
Lid: Naked (from Urban Decay Naked Palette)
Contour: Buck (from UD Naked Palette)
Outer V: Hustle (from UD Naked Palette)
Middle: Half-Baked (from UD Naked Palette)
Eyeliner: Kiss Me Heroine Make Smooth Liquid Eyeliner in Black 
Inner Eye: Holika Holika Jewel Light Waterproof Eyeliner in Pink Topaz
Lower Lashline: Chanel Stylo Yeox Waterproof Eyeliner in Espresso AND Make Up Store Microshadow in Spice
Mascara: Dejavu Fiberwig Paint-On False Lashes Extra Long Mascara

If you noticed, the black eyeliner has transferred just a wee bit to my undereye.


But the eyeliner generally held up well with no transfer to my crease, and barely any smudging in my inner eye! The flick stays on as well! Yay to Asian-produced eyeliners!


And still relatively fresh faced, albeit with a change of clothes. This was after having a steamboat party with friends in which we were seated around the table getting a facial steam from the boiling pot of soup. Also, the weather was typically warm. I did no touch-up, nor did I blot at all and after 9 hours, my makeup stayed pretty fresh. I'll give credit to BeautyBlender, Revlon Colorstay liquid foundation, the e.l.f. Studio High Definition Powder which I used to set my makeup and lastly, the Urban Decay All Nighter Makeup Setting Spray!

Anyways, we are one day away from the weekend! Rejoice!

Thursday, February 7

How To: Cleaning Your Brushes

Today, I'll be talking about hygiene and tools!

You're probably thinking - what?

Let me begin by giving you a little background of my skin condition. I used to have generally good skin - enlarged pores, but no biggie. Till I decided to be adventurous and when DHC first hit Singapore about 4 years back, I splurged on its Olive Virgin Oil. Reviews were great, and I thought something natural wouldn't hurt my skin. I must have been using the wrong dosage as well because instead of using 1-2 drops, I was using 1-2 pumps (well, the pump is stupid).

Within a month or two, my skin went from normal to sandpaper rough. I had comedones underneath the skin, all over my cheeks and these couldn't be squeezed or removed. They were under the skin. I must say that having problematic skin gave me esteem problems, and I was conscious of anyone looking at my face.

Eventually, I figured out the problem, stopped using the Olive Virgin Oil and it was almost an entire year before my skin went back to its relatively normal state.

Things were fine for a while - still enlarged pores and the occasional zits but then without any warning, my face started breaking out all over again early last year. I couldn't figure out the problem and went to see my GP. She prescribed me some medication that is usually given to teens to control their hormones, and told me to stop using oil-based products as my skin could be sensitive to those.

I threw out my Biore sunscreen, Biore and FANCL cleansing oil, Skin Food essence and moisturizer and basically started from scratch again.

Invested in a water-based sunscreen from Uriage and am now using water-based products for my makeup remover, toner and moisturizer. Now my skin is back to normal again, with just some slight hyperpigmentation on the cheeks.

But choosing products that suit your face isn't enough! The tools you use on your face daily also matter. Tools like the kabuki brush, blusher brush, foundation brush, powder brush - they all transfer bacteria. Basically, you transfer facial oils from your face to your makeup, and then from the makeup back to your face again. And all those eye brushes need cleansing too. Who wants pink eye?

Also, when you purchase brand new brushes - wash those as well! Manufacturing and packing procedures are bound to leave some chemicals/dust/dirt on your brushes. For instance, I bought the Bubbi brushes in 2011 and when I was washing the brushes, I realised the colour of the kabuki brush runs! I must have washed it about 5 times before the water runs clear. Imagine transferring the dye onto your face.

So, deep cleanse your brushes! Suggested frequency would be once a week but I can only afford the time to do so once a month. When I do, I make sure to give my brushes a proper lathering using shampoo and then letting them airdry after.

Steps to Deep Cleansing Your Brushes:
#1: Get a little container - I usually use one that was previously used for beancurd/something not oily and easily cleansed.

#2: Mix some shampoo with warm water.

#3: Take the first brush that requires cleansing, and swirl the brush in the soapy water. Make sure that the soapy water doesn't go past the ferrule or the bristles may be loosened from the glue binding them all together.

#4: Use your fingers and work up a lather. You can also swipe the lathered up brush back and forth against your palm

#5: Rinse the brush under the running tap until brushes are free from soap and the water runs clear.

#6: Shape your brush bristles.

#7: Repeat with the rest of the brushes. Remember to change the shampoo solution once it becomes murky.

#8: Once all brushes are cleaned, place them in an open area to air-dry. Do not stand the brushes upright as the water will dribble into the ferrule. One way is to place a large towel on a flat surface, roll up another towel and lay the brushes with their handles on the rolled-up towel, while the brush ends are declined and dripping off onto the larger towel. It's gravity at work and your brushes will probably be dry the next day, depending on the density of the brushes.


Here are my brushes air-drying. I was too lazy to wait for my brushes to air-dry so I bought Sigma's Dry n Shape from Sigma's website during Black Friday - free international shipping! It was US$32, but I had to wait really long for the shipment to arrive. That was before I discovered Luxola and DolltoDoll, both local websites which carry Sigma products! Zzzzzzz.

That's not to say I go an entire month using dirty brushes though! In between, I do spot cleansing. In fact, I do spot cleansing everyday on brushes I use daily. It's also useful if you only have one eyeshadow brush and you want to use it on multiple colours.

Steps to Spot Cleansing Your Brushes:
#1: Purchase a bottle of Isopropyl Alcohol (aka rubbing alcohol). I got the 70% Isopropyl from Guardian at about S$4.60. The alcohol basically kills bacteria and germs.


This is how Isopropyl Alcohol looks like.
#2: Purchase an empty spray bottle - get it from Daiso or Watsons.

#3: Decant the Isopropyl you purchased into the spray bottle.

#4: After you use each brush, spritz once or twice on the bristles and swipe it back and forth on a tissue or towelette. I bought an entire kitchen roll for this purpose.

#5: Put the brush back into your brush holder; it's ready for next day's use since alcohol evaporates quickly!

My trusty bottle of 70% Isopropryl.
You can purchase Sigma's Dry n Shape here or here.